Installing a Mechanical Suspension Bus Driver Seat is a critical upgrade that directly impacts driver safety, comfort, and overall vehicle operation. Whether you're a fleet manager looking to enhance driver wellbeing or a mechanic tasked with seat replacement, understanding the proper installation process ensures you maximize the benefits of this ergonomic investment. This comprehensive guide walks you through each step of installing a mechanical suspension seat, with a focus on the YSR911 model from YSR Seating-a manufacturer known for quality and reliability in commercial vehicle seating solutions.
Pre-Installation: Safety First & Preparation
Before beginning any installation work, prioritize safety. Disconnect the vehicle battery to prevent electrical issues, and ensure the bus is parked on a level, stable surface with the parking brake engaged.
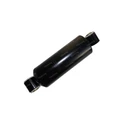
Gather your tools and materials: basic hand tools including wrenches, a socket set, screwdrivers, a torque wrench for proper bolt tightening, measuring tape, a level, and personal protective equipment like safety gloves and goggles.

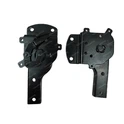
Verify that your installation kit contains all necessary components: the seat assembly, mounting brackets, bolts, washers, and installation instructions. Check that the seat's connection size (typically 216mm×295.5mm for the YSR911) matches your bus floor mounting points to ensure compatibility.
Step-by-Step Installation Process
Step 1: Remove the Old Seat
If replacing an existing seat, carefully disconnect the seat belt from its anchor points. Remove all bolts securing the old seat to the floor, noting their positions and the seat's orientation for reference. Lift the seat out carefully, as bus driver seats can be heavy.
Step 2: Prepare the Mounting Area
Thoroughly clean the floor area, removing all dirt, debris, and old sealant. Inspect the mounting holes and surrounding floor structure for signs of damage, corrosion, or wear. Address any structural issues before proceeding. If needed, use the new seat's mounting template to verify or mark hole positions accurately.
Step 3: Position the Mounting Components
Align the seat's integrated base or mounting brackets with the floor holes. For models like the YSR911, ensure you've selected the correct orientation-Front, Left, or Right style-appropriate for the driver's position in your specific bus model. Insert mounting bolts loosely at first to allow for fine adjustments.
Step 4: Secure the Seat
Once properly aligned, tighten all mounting bolts evenly in a sequential pattern to distribute pressure uniformly. This is crucial: use a torque wrench to tighten bolts to the manufacturer's specified torque value, which ensures both stability and safety. Verify that the seat sits level and doesn't rock or shift under pressure.

Step 5: Connect Safety Systems
If your bus driver seat suspension system includes an integrated seat belt, attach it to the vehicle's designated anchor points according to local safety regulations. Test that the belt retracts smoothly and locks properly under sudden tension.
Step 6: Test All Functions
Apply weight to test the mechanical suspension-it should compress smoothly and rebound without jerking or sticking. Operate all adjustment levers including height adjustment, backrest angle, lumbar support if equipped, and fore/aft slide mechanisms. Ensure all movements are smooth and that locks engage securely in each position.
Post-Installation Verification
After completing the installation, conduct a thorough safety check. Re-verify the tightness of all mounting bolts, as initial settling may occur. Confirm the seat doesn't interfere with steering wheel operation, pedal access, or dashboard controls. The driver should have an unobstructed view of all mirrors and instruments.
Take the bus for a short, low-speed test drive on smooth and slightly rough surfaces to evaluate the suspension performance under real operating conditions.
Why Choose the YSR911 for Easy Installation
When shopping for bus drivers seats for sale, the YSR911-8 model stands out for its installation-friendly design. It features pre-attached or clearly labeled mounting hardware, a standardized connection size for broad compatibility, and a robust mechanical system requiring no complex electrical or pneumatic connections. The seat is backed by ISO9001 certification and comes with a 12-month warranty, providing peace of mind for fleet operators.
Troubleshooting Common Issues
If the seat isn't level after installation, check the floor condition and consult the manufacturer about using approved shims. Difficulty aligning bolt holes may indicate compatibility issues or floor damage requiring attention. If the suspension feels stiff or doesn't move, check for transport locks or packaging restraints that need removal before operation.
|
|
|
|
|


Conclusion
Installing quality bus driver seats with mechanical suspension is a manageable task when approached with proper preparation, the right tools, and attention to detail. A correctly installed bus driver seat suspension system is fundamental to achieving maximum comfort, reducing driver fatigue, and improving safety for long-haul operations.
Ready to upgrade your fleet with seats built for durability and ease of installation? Contact YSR Seating today for expert advice, sample requests, or custom OEM/ODM solutions.
Contact YSR Seating:
Phone: +86-029-81136503
Email: sales@ysrseats.com
WhatsApp: +86-13991337062
WeChat: 18992819914