The RV and campervan community has embraced a vibrant DIY culture, with owners increasingly taking on customization projects to personalize their mobile homes. Among the most popular upgrades is the Fold Down RV Bed-a clever space-saving solution that transforms from comfortable seating during the day into a sleeping surface at night. But can you really install one yourself? The answer depends on your comfort level with basic tools, your vehicle's configuration, and the quality of the product you choose. Companies like YSR Seating design user-friendly, customizable seating solutions that make DIY installation more accessible than ever.
Understanding the Fold-Down Design
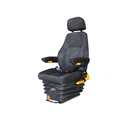
An rv seat bed combines dual functionality in one compact unit. During travel, it serves as secure seating with integrated safety restraints. At night, it converts into a sleeping platform, maximizing limited interior space. The typical assembly includes a sturdy seat frame, fold-down mechanism with slide rails, secure locking system, and comfortable upholstery. Well-engineered models like the YSRV-005 are specifically designed with straightforward installation in mind, featuring pre-drilled mounting points and clear assembly instructions.

Pre-Installation Preparation
Before starting your installation, careful preparation is essential. Begin by measuring your available floor space and identifying mounting points in your RV. Check existing seat belt anchor points, flooring condition, and any electrical connections if your new seat includes power features.
Tools & Materials Checklist
|
Category |
Tools/Materials |
Notes |
|
Basic Tools |
Wrenches, screwdrivers, drill |
For removal and installation |
|
Measuring Tools |
Tape measure, level |
Ensure level installation |
|
Safety Gear |
Gloves, safety glasses |
Protection measures |
|
Hardware |
Mounting bolts (usually included) |
Verify package contents |
|
Optional |
Shims (if floor uneven) |
For leveling adjustments |
Vehicle compatibility is crucial when installing rv seats with seatbelts. Ensure the seat base matches your RV's floor plan and mounting configuration. Consider weight distribution-improperly installed seats can affect handling and safety. If your RV has a wooden subfloor, you may need longer bolts to reach structural supports.
Step-by-Step Installation Process
|
Step |
Key Actions |
Important Notes |
|
1. Remove Old Seat |
Disconnect belts, remove bolts |
Record original belt anchor points |
|
2. Clean & Measure |
Clean floor, mark drill points |
Use level to ensure flatness |
|
3. Install Base & Rails |
Secure base, attach slide rails |
Follow manual tightening sequence |
|
4. Mount Seat |
Fix seat to base |
Check for wobbling or movement |
|
5. Connect Safety Belts |
Install per vehicle safety standards |
Anchor to structural supports only |
|
6. Function Test |
Test folding, sliding, locking |
Operate multiple times for smoothness |
Start by removing any existing seating. Disconnect seat belts carefully, noting their attachment points for later reference. Unscrew mounting bolts and lift out the old seat-you may need assistance as RV seats can be heavy.
Next, prepare the mounting area by cleaning the floor thoroughly and checking for levelness. Use the new seat's mounting template to mark drill points accurately. This step determines the stability of your entire installation, so take your time.
Install the seat base and slide rails according to manufacturer specifications. The rails allow the seat to slide forward or backward for optimal positioning. Secure all fasteners tightly, using a level to ensure proper alignment. Misalignment at this stage will cause operational issues later.
Carefully lift the campervan seats with belts onto the base and secure with provided bolts. Check stability by applying pressure from different angles-there should be no wobbling or movement. Connect integrated seat belts according to vehicle safety standards, ensuring they're anchored to structural supports, not just floor panels.
|
|
|
|


Finally, test the fold-down mechanism. Convert between seat and bed positions multiple times, verifying smooth operation and secure locking in both configurations. Adjust slide position and backrest recline as needed.
Common Challenges and Solutions
Uneven floors are the most frequent obstacle. If your RV floor slopes slightly, use shims to level the seat base before final tightening. Obstructed mounting points may require relocating the seat slightly or using alternative anchor positions-just ensure structural integrity isn't compromised.
Fold-down mechanisms require precise alignment. If the bed doesn't lock properly or feels unstable, recheck the base installation for levelness. Sometimes loosening all bolts, repositioning, and retightening in sequence resolves alignment issues.
Know when to seek professional help. Structural modifications, custom floor reinforcement, or complex electrical integration may require specialized skills. Safety should always be your priority.
The YSRV-005 Advantage
Product Specifications
|
Parameter |
Details |
|
Model |
YSRV-005 |
|
Type |
VIP Fold Down RV Bed |
|
Size Range |
450–1750 mm (customizable) |
|
Upholstery Options |
Fabric / Korean Leather / Nappa Leather |
|
Certification |
ISO9001 |
|
Warranty |
12 months |
|
Installation |
Slide rail system, adjustable positioning |
|
Features |
Hidden headrest, quick-release cushions, reclining backrest |
YSR Seating's YSRV-005 model exemplifies installation-friendly design with quality backed by factory-direct pricing without middlemen markup.
Safety and Final Checks
After installation, verify all bolts meet torque specifications. Test seat belt functionality thoroughly-they should retract smoothly and lock firmly under sudden tension. Check for interference with doors, cabinets, or walkways. Ensure the seat doesn't obstruct driver visibility or vehicle controls.
Frequently Asked Questions
How long does it typically take to install an rv seat bed?
Most DIY installations take 2-4 hours depending on your experience level and whether you're replacing an existing seat or creating a new mounting point.
Do I need to reinforce my RV floor before installation?
Most modern RVs have adequate floor strength, but if you're installing in an older vehicle or over a weakened area, consult a professional to assess structural integrity.
Can I install it alone or do I need help?
While possible alone, having a second person helps when lifting and positioning the seat, especially for larger models. The seat itself can weigh 30-50 pounds or more.
Are the seat belts as safe as factory-installed ones?
Yes, when properly installed to structural mounting points and meeting vehicle safety standards. Quality campervan seats with belts undergo rigorous testing and certification.

Conclusion
With proper preparation, basic mechanical skills, and a well-designed product, installing a fold-down RV bed yourself is entirely achievable. You'll save money on labor costs while gaining the satisfaction of personalizing your RV with your own hands. The key is choosing quality components designed for straightforward installation.
Ready to upgrade your RV with a versatile sleeping solution? Contact YSR Seating for product details, installation guidance, or customized configurations tailored to your vehicle.
Contact YSR Seating:
Phone: +86-029-81136503
Email: sales@ysrseats.com
WhatsApp: +86-13991337062
WeChat: 18992819914